Nothing is more universally dreaded by game designers than writing rulebooks. Explaining complex ideas using just text and static pictures is a huge challenge. But writing a clear rulebook is absolutely essential to game creation. These six tips will help you jumpstart writing your game’s rulebook.
Find rulebook editors in our Ultimate Guide to Board Game Services
1. Decide on a Structure
Every game is different. So there is no standard structure for rulebooks. However, the best rulebooks I’ve seen generally follow the format below. Each section builds on information presented in previous sections. This format builds knowledge in a logical and concise manner. Whatever structure you decide on, I recommend drafting an outline of the format at the beginning of the rulebook document. It’s a good way to keep your thoughts organized as you continually make changes. Just be sure to delete the outline in the final version of the rulebook.
- Thematic Intro/Background – A short summary regarding the setting and theme of your game
- Thematic Objective – Explain what the goals of the players in terms of the theme. From this, players should have a rough idea of how they will be interacting with each other and what the win conditions are
- Component List – A list of game components. It should be detailed enough so that the players can determine if they have all the parts of the game
- Set-up – Show where to place components and other preparatory steps
- How to read components – This should detail how to interpret the info on the cards, dice, tiles, or other components
- First Player – Explain how to select a first player
- Typical Turn – Explain what actions can take place on a typical turn. This section should be very detailed. It will likely be a section that will be read the most.
- Special Actions/Turns – Outline actions that can be done in turn or out of turn
- Examples of Gameplay – Include the most common actions in a typical turn
- Endgame/Scoring/Win Conditions – Detail at what point the game ends and how to determine a winner. It’s also good to include tiebreaker instructions
- Appendix – This is a good place to put information that’s not necessary for gameplay but could still be useful information, such as a breakdown of the types of cards in a deck.
- Glossary – Write this out even if you don’t end up including it. It’s a good way to keep yourself consistent when using terms. Use this to help players understand unique concepts or terms in your game
- Frequently Asked Questions (FAQ) – While playtesting, keep a list of the most commonly asked questions. Put that list with answers here.
- Rulebook version – You’ll need to decide how to keep track of each version of your rules as you make changes. I prefer to use the date I added the latest changes.

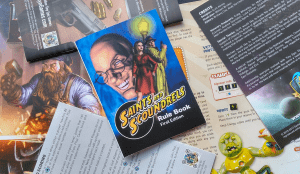
An assortment of rulebooks.
2. Just Write, Re-write, and Write Some More
Just as game design is an iterative process, so is the writing of rulebooks. You will likely write several versions of your rulebook before completion. I highly recommend writing your rulebook in stages with specific goals at each stage. In the first stage, your goal is to capture all the rules on paper. Don’t worry too much about formatting, as long as you can understand and follow it. Most designers bring this rough draft of the rules with them when playtesting. It’s a great document to take notes.
In the second stage, begin to address rules that most often needed clarification in playtesting. Try changing the wording. If you’re not much of a wordsmith, ask other designers or trusted playtesters for advice. You should also try to provide examples or pictures to clarify confusing rules. Most importantly, keep your audience in mind. Ask yourself, “Is this language/format something my core market will understand?” This is the stage when you should start tailoring your rulebook for your audience.
In the third stage, you should focus on making all the terminology consistent throughout your rulebook. This is where a glossary comes in very handy. For example, player pieces are often referred to as pawns or tokens. At this point, you should decide which term you will use. This will help reduce confusion. The search and replace functions are particularly useful here. Don’t be afraid of sounding repetitive. It’s better to sound repetitive than confusing.
In the fourth stage, edit your rules to make sections and subsections easier to find. For my Saints and Scoundrels game, I decided to use 16 point bold font for the sections, 12 point bold font for the subsections, and 10 point font for the regular text. Use any legible font like Calibri or Arial. Avoid using thematic fonts like Comic Sans or Showcard Gothic otherwise you’ll end up giving your players headaches. Many software applications allow you to define your own custom styles; so rather than clicking 4 or 5 times to get 16 point bold, Calibri, you can create your own style and click once. It also allows you to more easily change those styles for the entire document.
3. Highlight Important Concepts with Pictures
Some concepts need a bit more explanation. In these cases, pictures are a huge help. Go through your rules, find any of the following areas, and use pictures to reinforce to the rules
- Critical concepts or game mechanics – use pictures to highlight the primary game mechanics for your game. If players don’t understand these, your game likely won’t work. Don’t be afraid of being repetitive. Using text and pictures is a great way to illustrate an important idea.
- Aspects that playtesters often ask for further clarification – Be sure to take good notes while playtesting and keep track of the most often asked questions. Use pictures to ensure these questions are addressed in your rulebook.
- Special actions or conditions – Examples of special actions include actions that players can take when it’s not their turn, actions that provide some kind of bonus, or actions that change the normal turn order. Use pictures to help players understand what conditions need to be met to use these actions or how these actions are resolved.
In addition, the following will likely need some kind of picture or diagram:
- Set-up – Use a picture to show what the initial set up looks like. Make sure it is detailed enough so that players understand where specific components go. Consider using a photograph rather than an illustration. Using labels and arrows may also be useful.
- How to read game components – Use labels and arrows to describe the information on the game components like cards, tiles, or special dice.
- Icons/symbols – Provide an explanation of all the icons and symbols used in your game. If you use 10 or more icons/symbols, consider putting them all in an appendix in your rules.
It’s a good idea to label each picture (for example: Figure 1, Figure 2, etc.) and refer to the pictures in the text (for example: See Figure 2). This will help players relate the text with the pictures and avoid confusion.
4. Be Consistent when you Capitalize, Bold, and Italicize
Overall your goal for rulebook writing is clarity and consistency. If anything you do seems to detract from that then you need to rethink what you’re doing. I recommend, writing down how you will use capitals, bold, italics, or any other special formatting. Then applying those rules uniformly throughout your rulebook.
You can look at my rules for Saints and Scoundrels as an example of when to bold, capitalize, and italicize.
Bold – I use bold for paragraph titles to make them easier to find. For example, in my Turn Order section I bold “Current Player Actions” then I explain what those actions are. I think I could have also used italics. I could have even used all caps. But I actually think all caps is a little harder to read. The bolded letters also make understanding the whole turn order easier to understand. If you look under the Turn Order section again and read all the bolded text, you’ll see a quick summary of the steps. I wouldn’t necessarily bold the same words throughout the rulebook. I use bold to emphasize context rather than the words themselves.
Capitalize First Letter – I capitalize the first letter of words that are important and distinct concepts in my game. In other words, if some word is capitalized, there’s probably a section in the rules that explains specifically what that thing is. Examples: Movement Card, Menace Card, Informant.
Capitalize All Letters – I try to use this sparingly but I mainly use it for extremely important informant like “DO NOT LOOK at the Dr, Xyko cards”. I also use it to highlight information that my playtesters often missed in playtesting.
Italicize – I didn’t use italics much in my rulebook except for the FAQ section. I think for the particular font I was using, italics didn’t stand out much compared to regular text so I didn’t see much point in using them. However, I’ve seen other rulebooks use them effectively particularly for short side notes and examples of gameplay. I prefer to use tone boxes for side notes.
5. Get a Friend to Read Your Rulebook or, Even Better, Hire a Professional Editor
There’s nothing worse than a beautiful game with a confusing and baffling rulebook. The best way to avoid this is to get as many eyes on your rulebook as possible. The most inexpensive method is getting your friends to take a look. I recommend having at least two people review your rules. If you’re lucky then you have a friend with professional experience in proofreading and editing. But friends without such professional experience can still help you understand if your rulebook language is clear and understandable.
I highly recommend hiring a professional editor. Writing to a level that’s understandable to a wide market is very difficult. I minored in English in college. I also write and edit technical reports for my regular job and I still felt I needed to hire a professional editor for my last game. Even here at Meeple Mountain, home to many exceptional writers, every article is reviewed by several other people. At the very least, a professional editor will ensure you are following the best rulebook writing practices in the board game industry. In my opinion, hiring a professional editor is a high return investment.
You can begin your search for an editor by checking our our Ultimate Guide to Board Game Services. Just filter the list to find all the editors. The article also provides tips on what to ask before hiring, ensuring a smooth working relationship, and following up after the editing is done. I did an informal poll of rulebook editors and found that most fall into the $25 to $50 per hour range. The rates mainly depend on experience. People just starting out were on the lower end of the scale. I found a person charging more than $100 per hour but his 20+ years of experience with various big name publishers definitely merited the price. Typically, the editor will provide a “per hour” rate with the initial contact. Then they will ask to view the current state of your rulebook. Afterwards, they will provide you an overall estimate for the total work they will do.
You can hire more than one professional rulebook editor but, in my opinion, that’s overkill. If you have a very complicated rulebook for a heavy game, I can see why you’d be tempted to hire more than one editor. But in that case, I think you’d be better served by hiring one of the larger professional editing companies rather than a freelancer. Either way, who you hire is ultimately your decision.
6. Conduct a Blind Playtest
The final stage of rulebook writing is blind playtesting. Blind playtesting involves giving your complete prototype and rules to a group of playtesters to evaluate if they can understand how to play just by reading the rules without any assistance from you. None of the playtesters should have previously played your game at all. You can be present during the blind playtest but you will need to fight the urge to answer any questions. Some people prefer not to be present at all so as to be confident the playtesters truly figured out the game without any input from you. That’s a good point but I prefer to be present just to see what rules and concepts the playtesters have problems with. If you can’t or choose not to be present, then consider recording the play session (with permission from the attendees).
Your primary goal of blind playtesting is to ensure your rulebook is clear. You should be confident that your game mechanics, graphical design, and other elements of your design work well as presented. In other words, the goal of a blind playtest should not be to improve game design. It’s a rules test only. As I see it, blind playtesting is the last step before publishing or pitching to publishers.
You should conduct at least one blind playtest of your game, preferably two or three. If your game is on the medium to heavy side you may want to consider more blind playtests
Blind playtests typically take a little longer than regular playtests. It also takes a little more brain power from playtesters compared to regular tests. In consideration of the playtesters time and effort, I try to be reasonably confident the blind playtest will be successful. In addition to making sure the game mechanics are solid, I also make sure the rules have been proofread and at or near publishing quality.
If your rules include web links to “how to play” or gameplay videos, I recommend you blind playtest without your players watching them. Not all the future owners of your game will have immediate access to the internet when they first play. You want to make sure they can understand how to play with just the game box contents.
Some designers will provide a set of game rules to each of their blind playtesters as opposed to just one set of rules for the whole group. Although this goes against the idea of using just the box contents for a blind playtest, I think passing out multiple copies of rules is fine. This prevents any one player from being the sole interpreter of the game rules which may skew test results. It also saves a little time overall. You should also encourage your playtesters to mark up the rules for any typos or confusing language.
Final Thoughts
Writing rulebooks isn’t easy. There’s no real secret to creating them. You just have to tackle each problem one at a time. Ask for help from your network of designer friends when you’re stuck. After a little time and determination, you’ll have a rulebook worthy of being included in your awesome game.


It’s easier said than done. I could not figure out which software to use to create a rule book in which text and images go side by side as they are in most of the board games. MS word , Visio failed me.. any suggestions welcome ..
the same question brought me here! Any update about what you’ve used after more than a year?
MS Publisher is a much better tool – you can control graphics and text placement much better.
I use Power Point for this type of thing.
The flexibility to add in each piece (art, text, etc.), and then easily arrange and rearrange those pieces, and format each piece. It’s very nice.
I find it fairly simple for me. Even to figure out something I want to do that I don’t know yet. Because lots of computers have it. It’s built for quicker results from less experienced users. It’s been through years of improvements. And there is lots of people and communities out there who can be searched to provide suggestions.
Things like “Insert > Shapes” and “Insert > Text Box” and “Insert > Picture” covers a lot of my pieces generation. “[mouse over piece] > [right click] > Format Shape” helps to adjust some key details of pieces. “[mouse over piece] > [right click] > Bring to Front” (or Send to Back, Bring Forward, Send Backward) is really helpful to either set layering of overlapping pieces, or to get to a buried overlapped piece to select and edit it.
It’s the kind of thing you can hop in and try out and see if it’s working for you pretty fast.
I’ve tried Google Slides, but I find that it lacks a lot of the control and detail work I can get and like with Power Point. Even converting Power Point to Google Slides removes some of the details created in Power Point. But Google Slides should still be pretty good as a cruder version.